Did you know that how you build your fireplace fires and arrange your firewood can have a big impact on how clean and strong your fires burn? And, in fact, you might be surprised to learn that the way you were taught to build a fire (starting with small pieces of kindling, then placing the larger logs on the top) is not really the best approach to take.
 Here at Ashbusters, we recommend using the top-down method. According to the Chimney Safety Institute of America (CSIA), this approach of placing the largest logs at the bottom will actually give you better results – and you’d be surprised at how easy it is to build!
We’ll go over the top-down method step-by-step, so that you can use it to make your fires more productive from here on out. And remember – before building any fires for the year, be sure to schedule your annual inspection!
1. Start With the Largest Pieces of Firewood
To get started on your top-down fire, you’ll need to place the biggest logs you have on the floor of your firebox or wood stove. An important note here is to make sure the ends of your firewood pieces are facing the front and back of the firebox and not lying parallel to the fireplace opening.
Why is the placement of the logs so important? This set-up ensures air is able to access the wood easier and help fuel your fire. When you put the wood with the ends parallel to the opening of your appliance, the air only will hit the broad sides of the firewood, and it won’t circulate through the entire pile as productively.
2. Stack the Smaller Logs (Biggest to Smallest) On Top
Next, you’ll start adding layers on top of the bottom layer, with each level being made of smaller pieces of wood than the one before it. So, your bottom layer will have the largest logs, the next will have the 2nd largest, the next will have 3rd largest, and on and on until you’re left with the smallest wood pieces on the very top of the pile.
You’ll want to continue stacking your firewood until the wood reaches about half way up the height of your fireplace or wood stove. Typically, homeowners are able to stack about four to five levels of layers on top of the initial bottom layer. At this point, you shouldn’t have any kindling on your pile yet.
3. Add Your Kindling
Once your logs are all stacked, it’s time to add your kindling. Spread them out across the top of your stack, then add more layers until the stack is just below the opening of your fireplace. As with the wood pieces, your kindling pile should start with the biggest pieces, then get smaller as the stack goes up.
What exactly qualifies as kindling? Kindling is the smallest pieces of firewood – the twigs and branches, essentially. It ignites easier than bigger pieces, and provides a reliable medium for spreading the flames to the larger logs.
Stack the kindling until it nearly reaches the top of your firebox.
4. Finish With Tinder
After adding your kindling, finish your wood pile off with some tinder. This could consist of small wood shavings, dry grass, leaves, wadded up newspapers, or any similar items that take basically no effort to light. They should be small enough to light with just a single match.
5. Get the fire started
You are now ready to light your kindling. And once that’s done… that’s all there is to it! Since the fire is burning from the top to the bottom, it will ignite each layer as it burns down, meaning you can simply sit back and enjoy it.
Benefits of a Top-Down Burn
Got your fire going? Great! But… what exactly are the benefits of a top-down burn?
- You won’t need to constantly get up and add logs. You pretty much just light it up, then let it burn, allowing you the chance to fully relax and enjoy the heat.
- You’ll get a hotter burn, ensuring that comforting warmth you desire throughout the entire evening.
- Top-down fires burn cleaner, so you won’t have to stress as much as your carbon footprint.
- You shouldn’t notice near as much smoke. If you struggle with smoke entering your living space, this may help in solving the issue. (If not, reach out! We’d be happy to offer alternative solutions.)
- No more stressing about larger pieces of firewood collapsing into the smaller pieces and sending sparks and embers into your living space! Since the biggest logs are on the bottom, this won’t be a problem at all.
- There is also a lower risk of the fire going out mid-burn because no logs will be collapsing on each other and causing problems.
- Less ash is created, so there’s less mess after the fire is put out.
Basically, you get a stronger burning fire with less stress, hassle, and work on your part. And less mess, too. Can’t beat that!
Is Your Firewood Seasoned?
Now, if you tried a top-down burn (or any other type of burn), and you’re still experiencing a smoky living space and an unproductive fire, then it’s probably time to look at the type of firewood you’re burning. If the wood is wet and unseasoned, it simply won’t burn as well, or you may find that it won’t even catch on fire in the first place.
 Along with this, wood that isn’t seasoned increases the amount of creosote deposits in your chimney, which increases your risk of experiencing a chimney fire. If this a worry for you, don’t wait to book your next sweeping, so you can enjoy safer fires with every burning season.
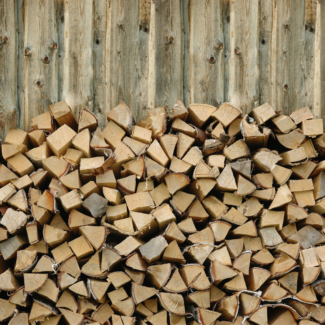
So, how can you know your fuel is good to go? All firewood used in your fireplace should be well-seasoned, meaning it has a low moisture content and has been dried for at least six months after being cut.
When purchasing, look for pieces that are shorter in length, split and dark at the ends, lightweight, and that give off a musty odor. Basically, if it smells and looks nice and fresh, that’s not the log you want!
You can also test your wood by smacking two pieces together. If this results in a hollow clunking noise, you should be good to go. Or, if you want to be very thorough (because sometimes even the best-looking logs can be deceiving), purchase a moisture meter! The moisture content of seasoned wood will be between 15 and 20%.
Storing your own wood? Keep it off the ground, away from your home, and cover it with a tarp on rainy or snowy days. Just be sure to remove any covering when the sun is shining, so it has ample opportunity to dry out! Or store it in a shed with a sturdy roof and open sides – this is an ideal set-up.
Need Chimney Care? Give Us a Call!
Over our years of providing chimney maintenance, repair, and installation services to the residents of the Nashville area, Ashbusters has been sharing these fireplace secrets with our customers because we want everyone to enjoy beautiful, safe, and long-lasting fires every winter.
If you need chimney care, you can trust that we’ll always put your best interests first! Give us a call or book your next appointment online to get started.